


(using EXC7017)
(Click Here to see our selection of Permaseal connectors).
| 1. Using a 2-Bladed stripping tool (EXC7010), strip coax as shown to right, exposing 3/8″ of the center conductor and remove 1/4″ of the outer coax insulation. Then cut the center back to having 1/4″ exposed, this insures that the center is cut clean and points out straight.
2. Fold the braid back over the outer jacket as shown to right. |
 |
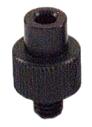
| 3. Insert the tool fitting required for the connector (see below). | ||
 |
 |
 |
| BNC | F100 | RCA |
 |
 |
 |
| 4. Carefully insert the coax into the connector as shown until firmly seated. In some cases, it may be easier to insert the connector into the tool first and then slide the wire through the end of the tool to the connector. Do not force into connector. The dielectric can get caught on the inner barrier, kind of rotate or wiggle to ensure the dielectric passes through the inner barrier. Continue pushing in to allow the wire to seat firmly. | ||
 |
 |
 |
5. Use the tool (EXC7017) to compress the back of the connector. It may be necessary to adjust the tool for a proper compression. The numbered parts are as follows:
|
 |
|
| Use pictures below to determine if tool has sufficiently compressed the connector. | ||
 |
 |
 |